
QUICK TIP: CONTOURING

TUTORIAL PHOTOGRAPHY BY AMY NADINE, GRAPHIC DESIGN BY EUNICE CHUN
We’re getting really technical today, ladies! I know a lot of you still don’t feel like it’s worth taking the extra step to contour. Or you are intimidated by all of the overly-exaggerated contouring photos floating around Pinterest and Instagram! But I can’t stress enough 1. how important it is and 2. how easy it easy! Foundation makes a blank canvas. That can actually make your face photograph heavier than it is! You have to go back and add dimension back in. And you do it quickly and easily with cream foundation one shade darker or bronzer. Revisit my Contouring 101 Tutorial to fully understand the technique. Now for the biggest tip I can give you!! When editors or clients ask me what’s the number one contouring tip, the answer is always the same… switch the angle that you hold the brush then blend up, blend up, blend up!
TOOLS:
- Cream Foundation One or Two Shades Darker: Try Shiseido The Makeup Foundation Stick because it blends incredibly and gives gorgeous coverage.
- Or Bronzing Cream: My newest obsession that is perfect for contouring is Becca’s Lowlight Sculpting Perfector.
- A Bulk-headed Brush: Try Tarte’s The Slenderizer Bamboo Contouring Brush to make an expert out of even the biggest novice.
STEPS:
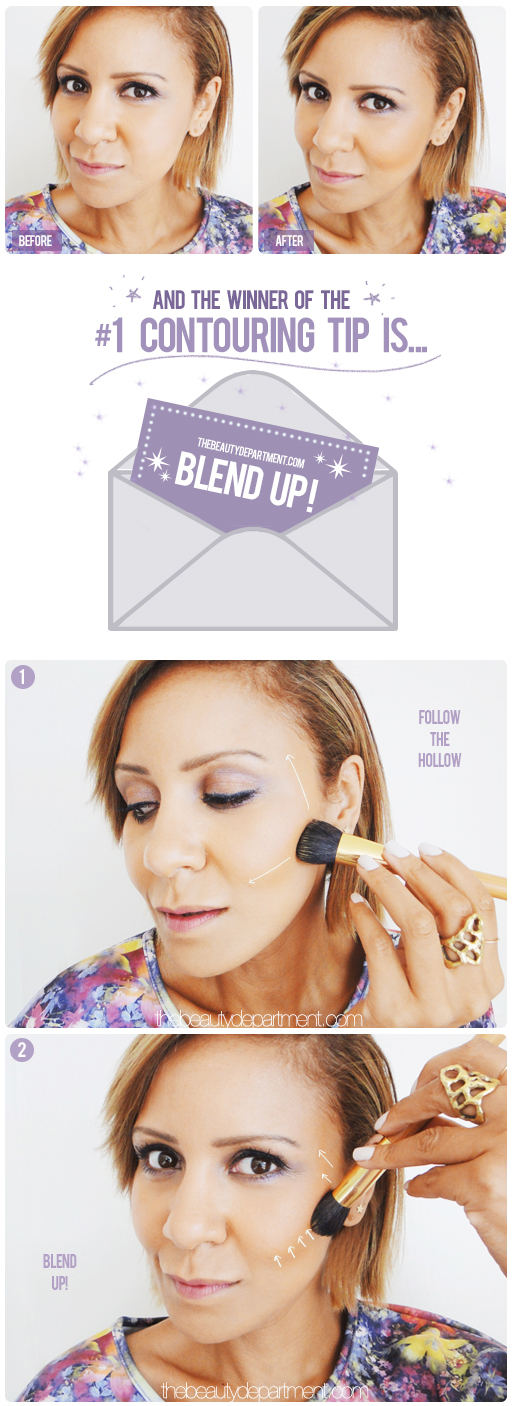
- Suck in your cheeks to see where the cheekbones pop out and where the hollow recedes inward. Apply the bronzer or darker cream foundation by following the hollow all the way to the temple as demonstrated on Taye above.
- Obviously you can’t leave it like that because it will look like you drew a line across the side of your face! So blending is key. But the way you blend is critical! If you don’t blend, you lose the effect and if you blend downwards in any way, you do more harm than good! So first change the angle that you hold the brush as demonstrated above, then place your brush along the line you just drew and flick it upwards to the lower half of your apples. Repeat the flicking motion from the line upwards as you move along the cheekbone to your temple. Trust me. This action is everything!